Video Converter Ultimate
 Screen Recorder
 Video Repair
 Secure Download
How to Record a Webex Meeting as a Host or Participant
We've all attended a meeting where a presenter is sharing something crucial, and you want to jot down everything, but while trying to concentrate on the presentation, it takes forever. Be it a team gathering, an online lesson, a client presentation, or a training, recording your meetings allows you to go back through all the things you missed anytime you need. That is why so many people are looking to know how to record a Webex meeting without any details being missed. Luckily, there are many ways to do it, whether you are the host or the presenter. These easy ways to record Webex meetings are offered here so you can save them and watch them at your convenience.

Part 1. How to Record a Webex Meeting As Host
Use Webex's Built-in Recording Feature (Hosts Only)
In case you are the one who starts the meeting, or you have been granted recording rights, a simple recorder built into the Webex recorder would be at your service. With it, you can conveniently record Webex meeting sessions without having to download any additional programs. Besides the meeting video and sound, the recording also contains the shared content, so you will be able to look through it or pass it on to others later.
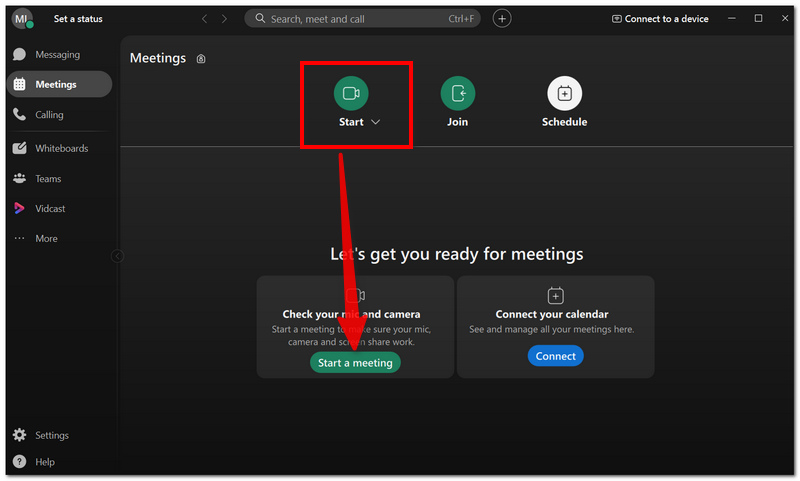
Step 1. Start your Webex meeting either by launching it or joining an already scheduled one if you're the host.
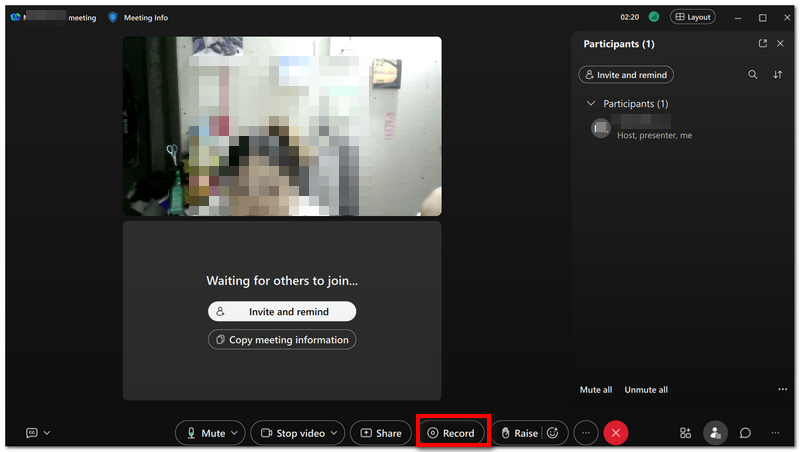
Step 2. As the meeting starts, hit the Record option located on the meeting control bar.
Step 2. Decide on the location where the recording will be saved. The option to record to the Cloud or to the Local Computer depends on your account type.
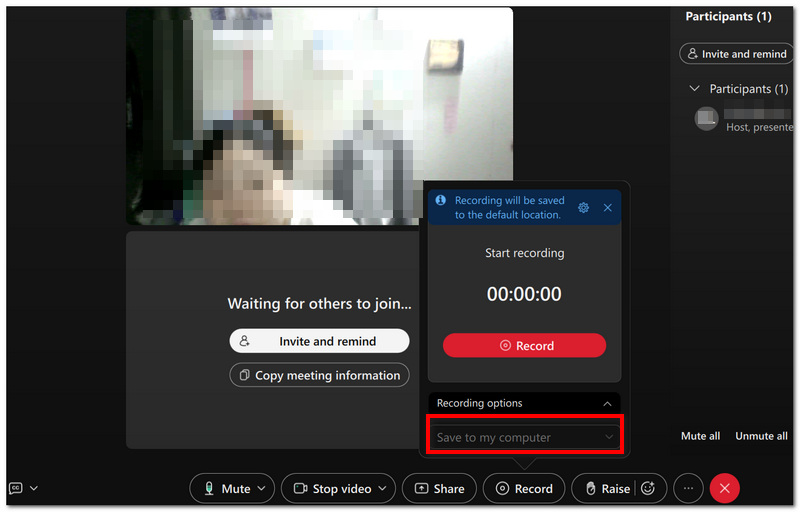
Step 3. Click Record to start recording the meeting. Proceed with your meeting as normal. To make it clear to the participants, Webex will show a recording sign.
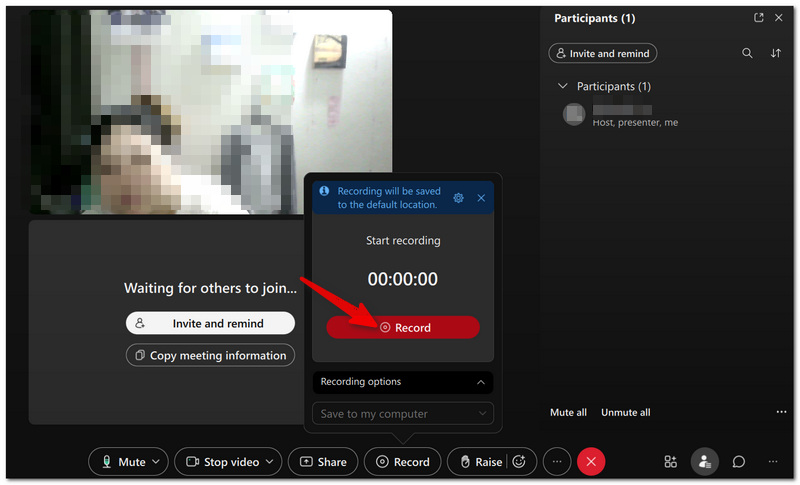
Step 4. If you want, click Pause to stop recording momentarily without finishing the session.
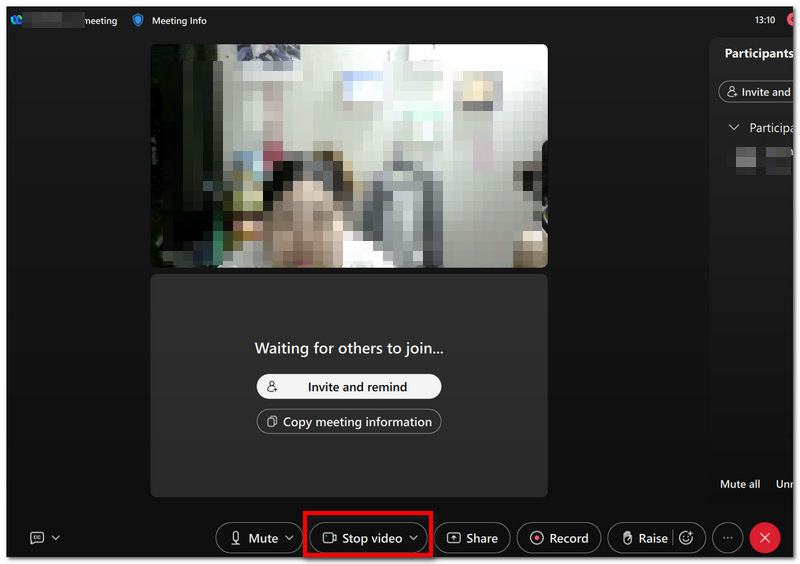
Step 5. After the meeting ends, click Stop Video to finish the meeting anyway. In case you decided on Cloud Recording, wait for Webex to process the video. You'll get a notification once it's ready. Choosing Local Recording means the video will be stored in your chosen folder after it is processed.
After the recording is done, you are free to play it back, download it if that option is open to you, or even share it with the attendees who weren't present at the meeting.
Part 2. How to Record a Webex Meeting as a Participant
Method 1. Record Webex as a Participant Using FVC Screen Recorder
On the off chance that you don't have host rights, FVC Screen Recorder is an easy tool to record a Webex meeting on your PC. Rather than being based on Webex's built-in recorder, it records whatever is shown on your screen plus the audio of the meeting. That is why it can be a handy way of recording a meeting in Webex for personal use, like going through notes or listening to important discussions again. Before recording, get permission from the meeting organizer and check if it is okay per your organization's policies.
Main Features
- SouThe soundpture system audio and mic separately or simultaneously.
- Meetings recording with high quality, even 4K in resolution.
- You can schedule recordings to start at a preset time automatically.
- Snapping screenshots of the meeting is allowed.
- Change recording resolution, frame rate, and output file format based on your needs.
Free DownloadFor Windows 7 or laterSecure Download
Free DownloadFor MacOS 10.7 or laterSecure Download
Steps to Record a Webex Meeting with FVC Screen Recorder
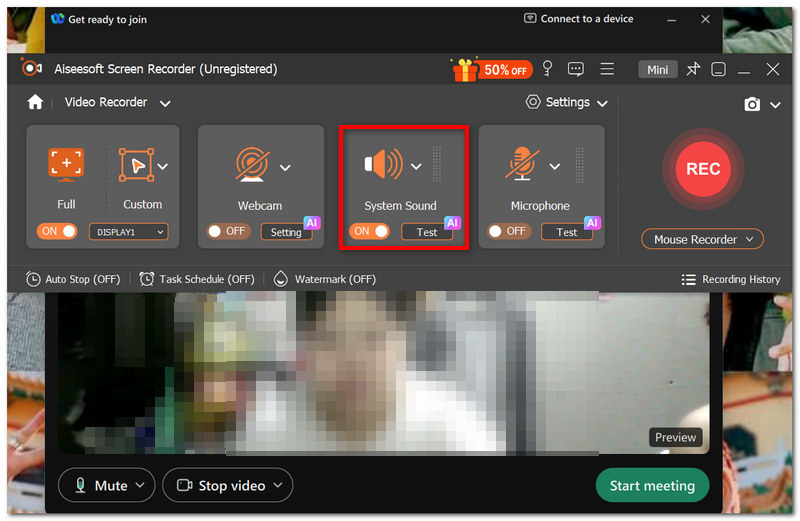
Step 1. Open the software and click on Video Recorder. You can either pick Full Screen or select Custom and then draw the area of the Webex meeting window.
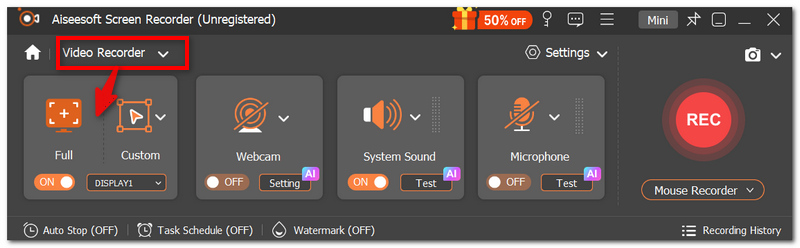
Step 2. To keep the meeting audio, enable System Sound. Only if you want to record your own voice, enable the microphone.
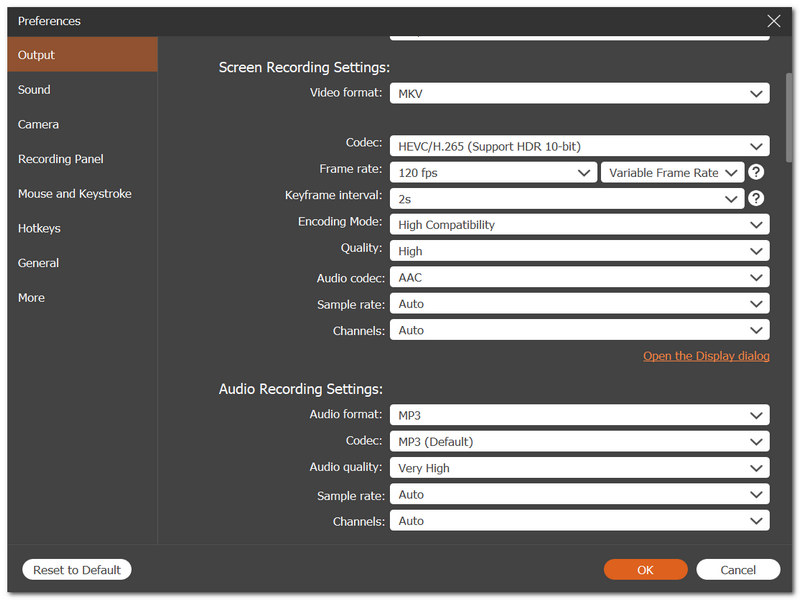
Step 3. Click Settings to change the output format, resolution, frame rate, and save location.
Step 4. Launch or enter the meeting you want to record using Webex. Switch back to FVC Screen Recorder and hit REC just before the meeting starts.
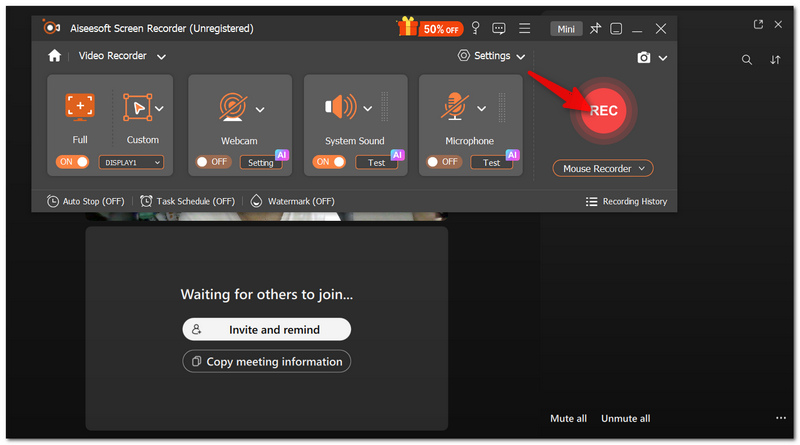
Step 5. The software will continue to record the screen and audio while the meeting goes on. Click the Stop button once the meeting is over.
Step 6. Show the recording, cut off unnecessary parts if you want, and click Save to output the video file.
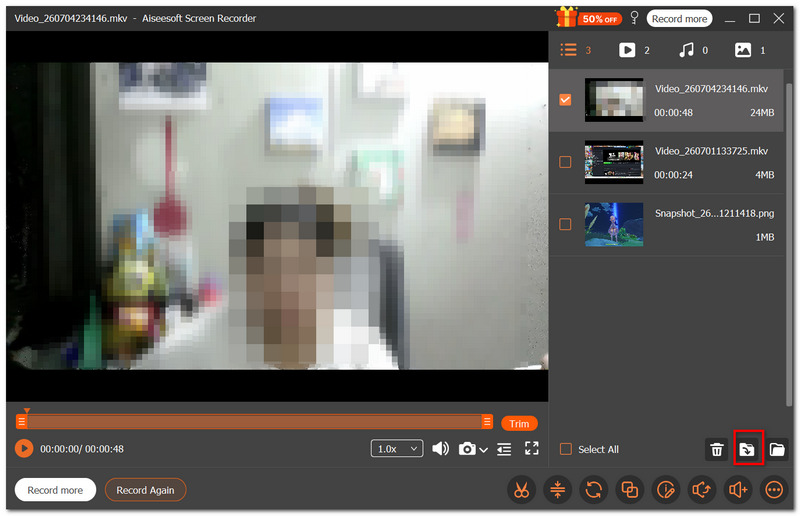
Even if it is a private Webex meeting, participants can use FVC Screen Recorder to document their discussions for their reference purposes, without host recording privileges, if permitted to do so.
Method 2. Quick Capture with Windows Snipping Tool
Suppose it is not necessary to have the whole meeting recording, but only important moments, the Windows Snipping Tool can be a handy built-in option. The newest Windows 11 editions come with a screen recording feature enabling you to record only the part of the screen that you want, without the need to download any other software. Although it is not meant for making full Webex meeting video recordings, it can come in handy for recording quick demos or the main parts of a meeting.
Step 1. Access the Webex meeting you wish to record, whether by opening it or joining it. To open the snipping tool, press Windows + Shift + S, or search for it in the Start menu and open it.
Step 2. Locate the video camera icon, which is the Record mode, and click on it to change from Screenshot mode to Record mode in the Snipping Tool window.
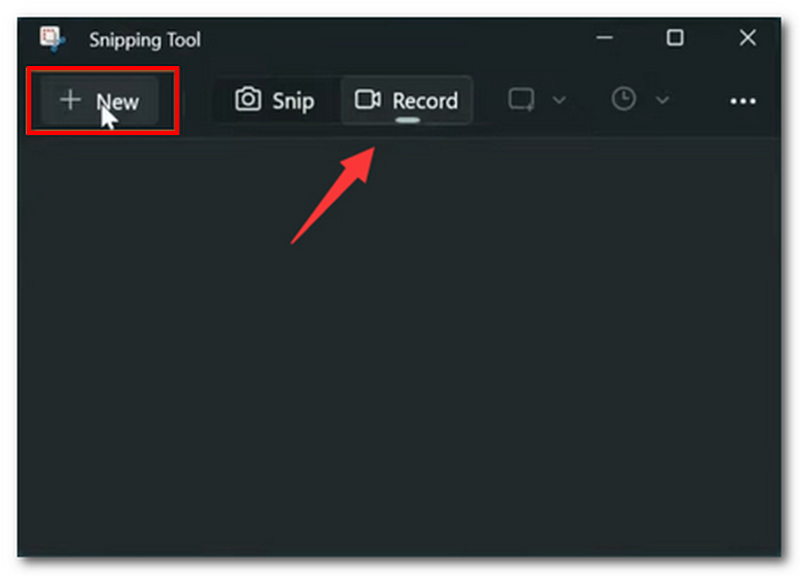
Step 3. Hit + New to commence a screen recording session. Guide your cursor to mark the area of the screen where the Webex meeting is.
Step 4. Click Start, and after the countdown disappears, the recording will commence. Keep doing your meeting while the Snipping Tool records the targeted screen area.
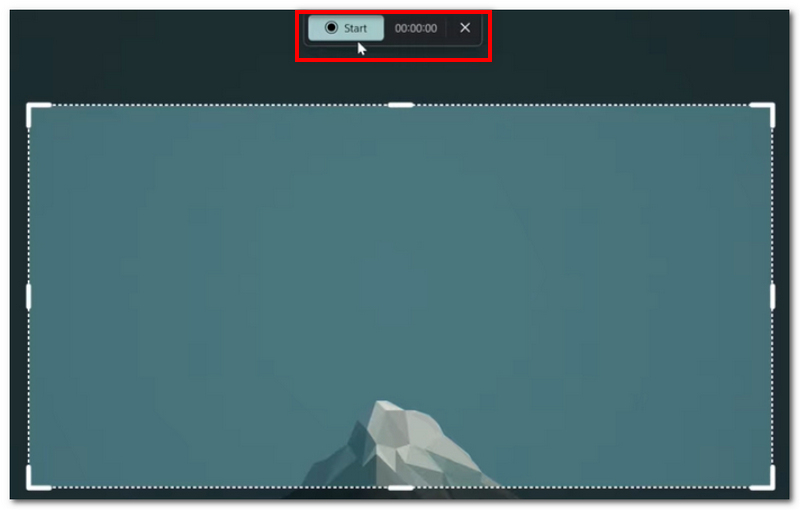
Step 5. When done, go to the recording toolbar and click the Stop button. Watch the recording in the Snipping Tool window.
Step 6. Hit Save and navigate to a folder on your computer where you want the video to be saved.
Note: Using Windows Snipping Tool is easy, but it only records videos. If you want to record the meeting's audio and screen, you would need to make use of a dedicated recorder. Besides, always ask for consent before recording a meeting.
Part 3. FAQs about Recording a Webex Meeting
Can I keep recording if the meeting host leaves the Webex meeting?
It is really up to the person who gets the new host role and the way you are recording. If you just use a normal screen recording software, it will still record as long as the meeting is running on your screen.
What happens if the screen sharing starts while I am recording?
Your recording will show what is visible in the recording area, so if there is a presentation or document being shared, it will be included in the recording.
Is it possible to move the Webex meeting window during recording?
Yes, but if you are recording a fixed window or a custom area, and you move the window outside of the recording area, the recording may not include that window.
Conclusion
As soon as you finish reading this guide, your knowledge level of recording Webex meeting sessions, as a host and a participant, should improve. Just select the recording method that suits your case the best and ensure that you are obliged to the recording rules of your organization.