


Best Ways on How to Remove Watermarks from Video in After Effects
Removing watermarks from a photo is easy using Adobe Photoshop. But do you know how to remove watermarks from video in Adobe After Effects? Some people say that it is challenging because there are only a few applications you can use to remove watermarks from a video. You are lucky. Using Adobe After Effects, this article will offer great methods to remove unnecessary objects from your videos or movies, such as watermarks, logos, texts, stickers, etc. Also, you will discover the best alternatives you must try, so you have many choices about what apps you prefer. Read the article for more details.

Part 1: How to Remove Watermarks from Video in After Effects
Adobe After Effects can easily remove watermarks and other frustrating elements from your videos. Also, you can do more things with its numerous tools. One of Adobe's most well-liked and cutting-edge video editing programs, After Effects elevates your work to a new level. This tool is used for the post-production process of movie-making, television production, and video games. Moreover, you can rely on this application for animating, composting, tracking, and keying.
Furthermore, Visual designers, animators, advertising agencies, video editors, motion graphics designers, social media specialists, video producers, video editors, UX specialists, and animators all use After Effects. However, Adobe After Effects is not perfect for non-professional users. It has a lot of tools, complicated processes, and advanced features, which is confusing. Also, you can only use the free trial for up to seven days. You must purchase the software to utilize this software continuously. Follow the simple steps below to remove watermarks from a video.
Step 1: Download Adobe After Effects and install it on your device. Launch the apps, and go to File > Open to insert your video with a watermark.
Step 2: Go to the Tracker tab and hit the Tracker motion. Place the tracking box on the area of the watermark and hit the track forward arrow.
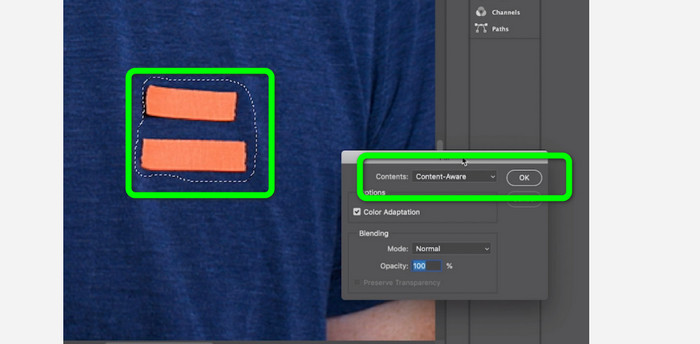
Step 3: Select the watermark using the Marquee tool and choose Edit > Fill. When the dialogue box appears, select Content-aware and press OK.
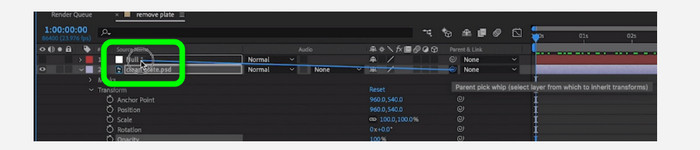
Step 4: Link the tracked Null object to the masked still frame using the pick whip. It will then become associated with the moving Null object. Your video should now have an undetectable watermark when you play it.
Part 2: Easiest Methods to Remove Watermark from A Video
Using Video Converter Ultimate
As we know, Adobe After Effects is difficult to use, especially for beginners. In this case, the most effective and easiest application to remove watermarks from your videos is the Video Converter Ultimate. It has a simple interface and comprehensible methods, which is perfect for everyone. Aside from watermarks, you can also remove other disturbing elements, like logos, stickers, emojis, texts, and more. The removal process of this tool is fast, so you don’t have to wait a little longer.
Furthermore, it has more features than you imagine. If other devices do not support your video, you can convert it to another file format. This tool can convert video and audio file formats. Also, if your video is too fast and you want to slow it down, you can still rely on this application because it offers a Video Speed Controller feature wherein you can adjust your video speed from 0.125x up to 8x faster.
To remove watermarks from your videos, use the detailed guides below.
Using Video Watermark Remover
Step 1: You can download the Video Converter Ultimate on your Windows and Mac by clicking the Download button below. After the installation process, you can instantly launch it.
Free DownloadFor Windows 7 or laterSecure Download
Free DownloadFor MacOS 10.7 or laterSecure Download
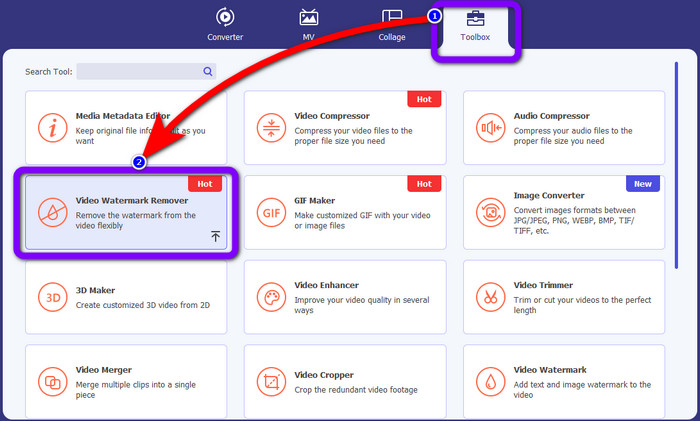
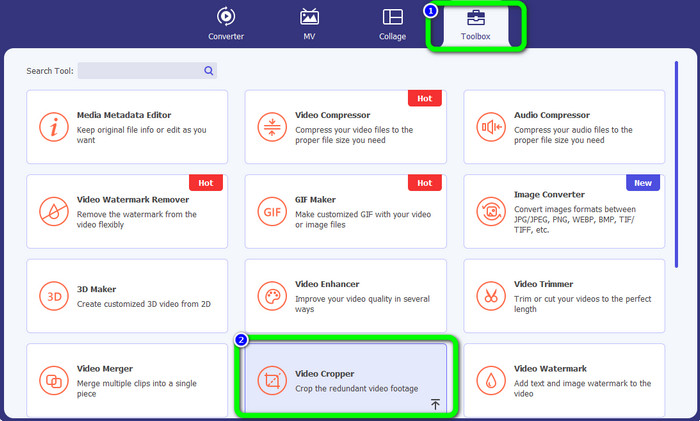
Step 2: Select the Toolbox panel from the four options on top, and click the Video Watermark Remover. Expect that another interface will show up.clicking the Download button below. After the installation process, you can instantly launch it.
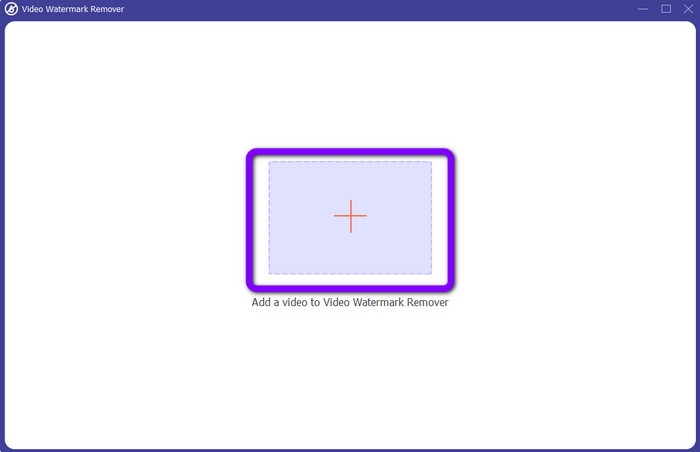
Step 3: Click the Plus icon. Your folder will appear, then choose the video with a watermark you want to eliminate.
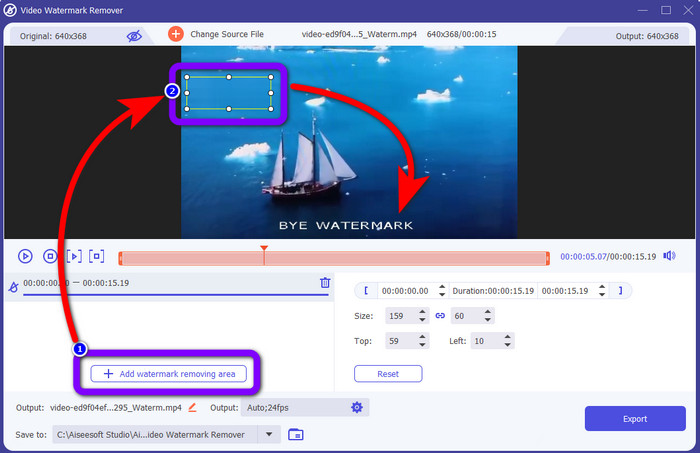
Step 4: Press the Add Watermark Removing Area button after attaching your video with a watermark. A small square will show up on your video. Use this to cover the watermarks.
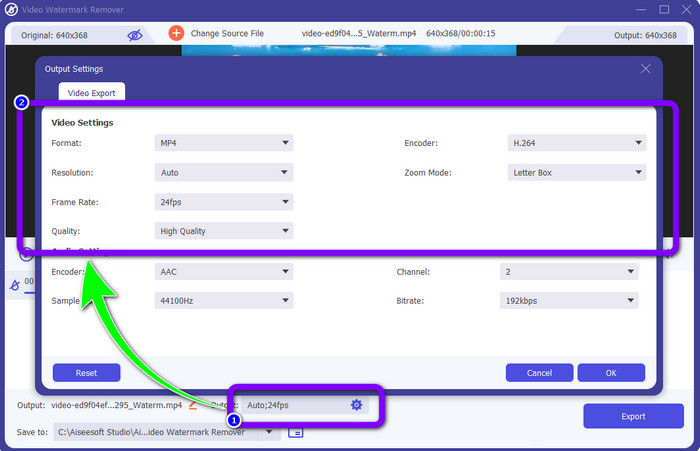
Step 5: After covering the watermarks, you can also change the format, quality, frame rate, and resolutions of your video by clicking the Output option on the lower part of the interface.
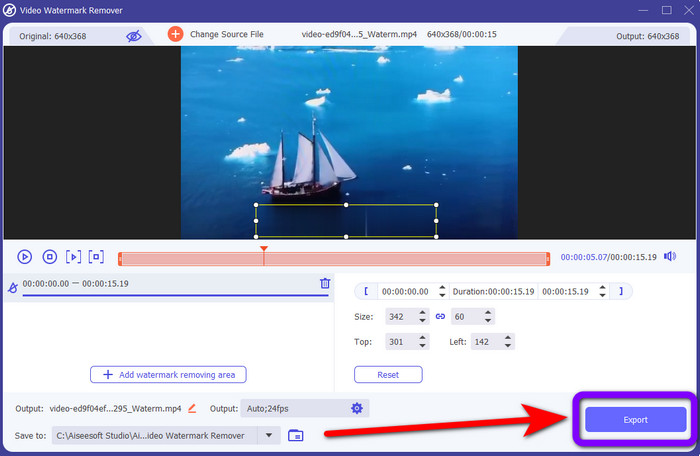
Step 6: Step 6: For the final step, click the Export button and save your edited video.
Using the Video Cropper
Step 1: Go to the Toolbox panel and select the Video Cropper tool.
Step 2: Press the + icon to add the video with a watermark.
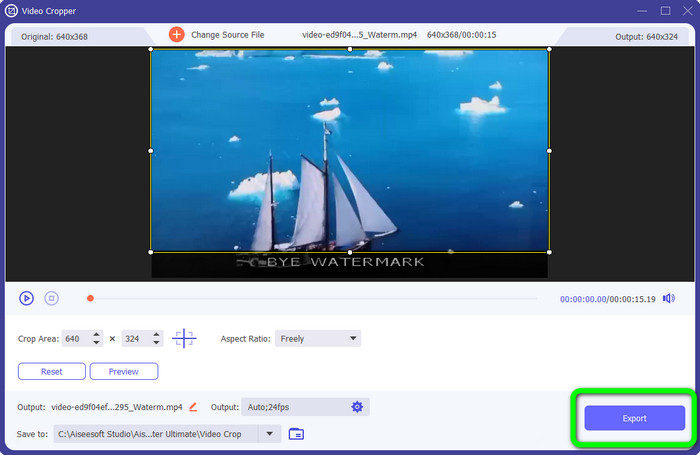
Step 3: You can crop your video to eliminate the watermark in this part. You can also go to the second box to select the cropping pattern you prefer.
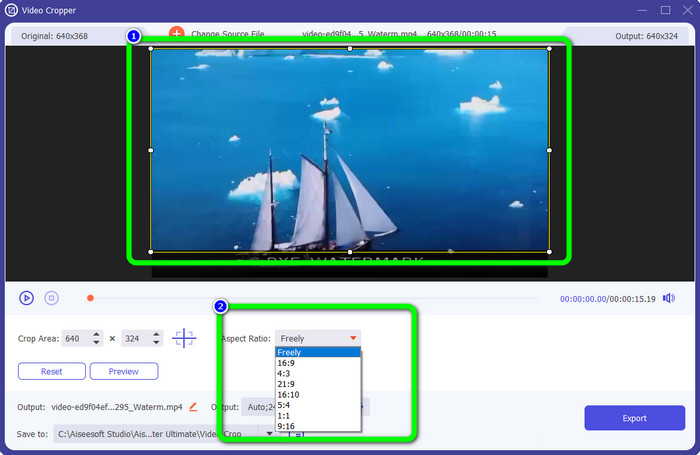
Step 4: If you are done cropping your video, click the Export button to save the video without a watermark.
Using Video Watermark Remover Online
After knowing the easiest methods using offline tools, we will show you another watermark remover you can try online. This application is the Video Watermark Remover Online. It is a new, fully automated video watermark remover that will make your life trouble-free. Also, you can remove various elements from your videos, such as logos, signatures, date stamps, watermarks, texts, and more. This software is similar to other removers, but the only thing that makes it unique is it can remove watermarks automatically. This application was made to detect objects and replace them with matching colors to render and fill everything to look like the original file.
However, you can only upload five videos when using the free version. It also has a slow encoding process, and you cannot export it to other file formats. You must buy a subscription to experience more great features from this tool. Follow the steps below to remove watermarks from your videos using Video Watermark Remover Online.
Step 1: Go and visit the Video Watermark Remover Online. Click the Blue box to add your video. You can also drag your video.

Step 2: After processing the file, click the Remove Watermark button. Wait for the removal process. Save your video without a watermark.

Part 3: FAQs about Removing Watermarks from A Video
1. What is the best video watermark remover for Windows and Mac?
Video Converter Ultimate is the best watermark remover. It can easily eliminate unwanted objects from your videos, such as watermarks, logos, stickers, texts, etc.
2. Is video watermark remover online safe?
Not all are safe. After removing the watermarks using online tools, they can immediately delete your file so no one can view and use your video file. However, some apps are not safe, so you must first check the application you are using.
3. Will the quality of my video change after removing the watermarks?
It depends on the applications you are using. If you don’t want to affect the quality of your videos, you can use Video Converter Ultimate
Conclusion
You have gained an idea and learned how to remove watermarks from videos in Adobe After Effects. Also, this post provided you with the best alternatives to remove watermarks with the most straightforward methods. And if you want to remove unwanted elements from your videos efficiently and without losing the quality, you can try using the Video Converter Ultimate.
-
 Solid Evidence to Do Slow Motion Videos Using After Effects
 Any thoughts or feelings can be gSolid Evidence to Do Slow Motion Videos Using After Effectsenerated or enhanced by watching something in slow motion. Read this article to know how to create slow motion in After Effects.
-
 How to Speed Up Video in After Effects [Best Speed Up Tool]
 Speed up or slow down your video using the best speed-up video tool. Learn how to speed up a video in after effects by reading this article.
-
 Step-by-Step Guides on How to Remove Emojis from Video
 Feeling annoyed with emojis on your videos? This post will bring you the best procedures to instantaneously remove emojis from your videos using great tools