


A Full Review for You: Does Google Drive Compress Photos?
Some websites have restrictions on the width and height of the inserted images. Therefore, it is inevitable that you will encounter a situation where you need to enlarge or reduce the size of an image. When it comes to working with images, the first thing that will come to your mind is the expert in this industry, Photoshop. it is known for its many features. For professionals, Photoshop is undoubtedly the ideal choice for resizing images. But if you are a novice, you may be stuck on not finding the corresponding functions.
That's okay; we've covered you with our most detailed guide on shrinking an image in Photoshop. If you have a more urgent task, consider another image manipulation tool we recommended in this article.

Part 1. How to Resize An Image in Photoshop
Let's first look at what you can do to change the size of an image using Photoshop.
Be aware that the steps for changing the size of an image and reducing the size of an image may be slightly different. That's why we'll divide the step-by-step guide into two parts. You'll find specific guidelines on reducing image size in the next section.
Step 1. Open Photoshop, then go to File > Open to select the image you want to resize.
Step 2. Navigate to Image > Image Size.
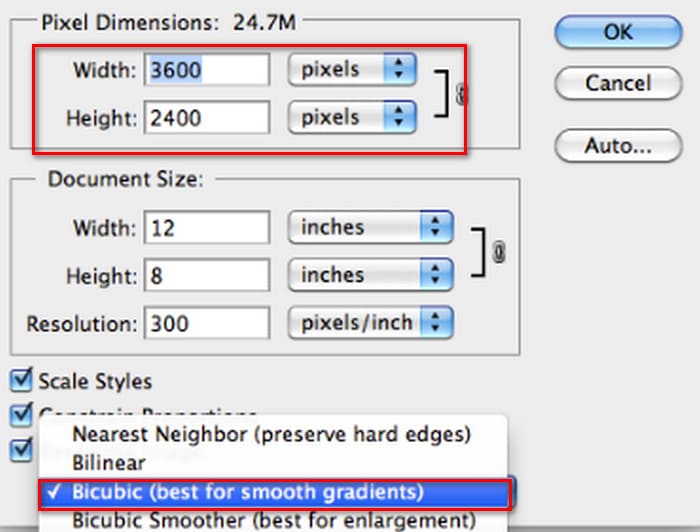
Step 3. Enter your desired pixel dimensions, document size, or resolution in the Image Size dialog box..
Step 4. Choose a Resampling Method before confirming.
Bicubic: Ideal for smooth gradients; it calculates average pixel values for precision.
Bicubic Smoother: Best for enlarging images, especially those with noise, resulting in a softer appearance.
Step 5. Click OK to apply the changes.
You have now successfully changed the width and height of your image. However, please note that this may also increase the size of your image file. So, while you are aware of the aspect ratio, be sure to check that the size of the image file matches the requirements of your platform.
Part 2. How to Shrink An Image in Photoshop
In this section, we will focus on how to reduce the size of an image in Photoshop.
Step 1. Launch Photoshop and navigate to File > Open to choose the image you want to edit.
Step 2. Go to Image > Image Size. This will open the Image Size dialog box.
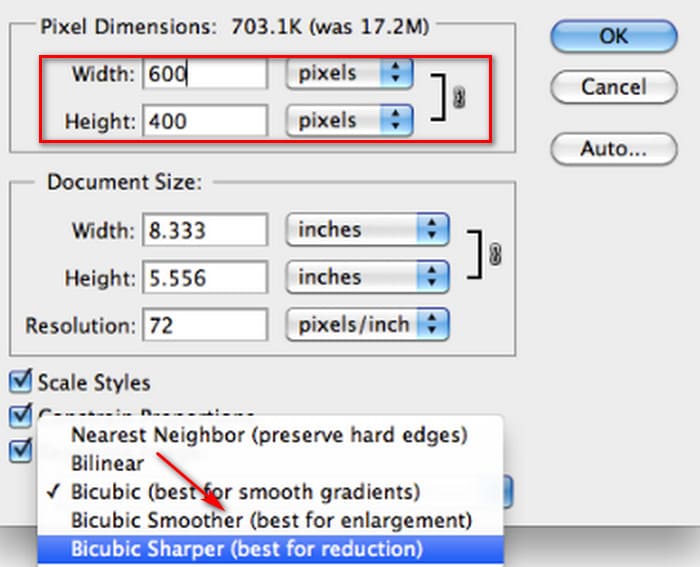
Step 3. Input the new values for pixel dimensions, document size, or resolution based on your needs.
Step 4. Choose a Resampling Method.
Bicubic: Ideal for smooth gradients; it uses surrounding pixels to generate precise results.
Bicubic Sharper: Recommended for reducing image size while maintaining sharp details. If the image becomes overly sharp, switch back to Bicubic.
Step 5. Click OK to apply the changes and resize your image.
Now you have successfully reduced the size of the original image. However, as was the case in the first part, you will also notice a significant change in the size of the image file after completing the operation, which is mainly reflected in the fact that it has been compressed smaller.
It should be noted that the quality of the image may have been lost. If you think it's a bit too much for your viewing pleasure, you can fix it again by using the image enhancer.
Part 3. How to Batch Resize Image Size in Photoshop
Quite a few steps are required to resize an image with Photoshop. When you have a lot of images that need to be processed, dragging them one by one into Photoshop to edit them is very time-consuming and cumbersome. Luckily we have another way to batch reduce the size of images.
Here is how to batch reduce image size in Photoshop.
Step 1. First, place all the photos you want to batch compress into a single folder.
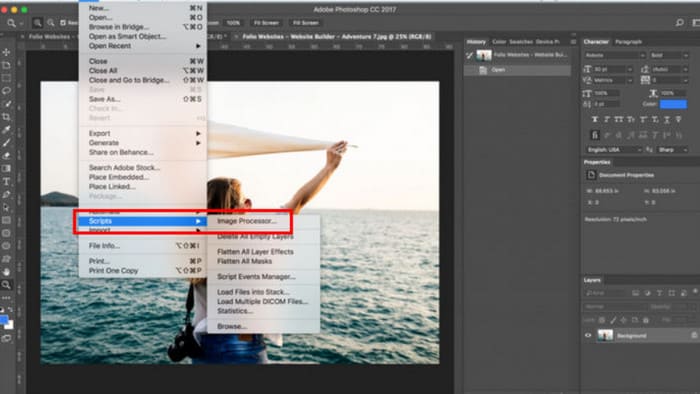
Step 2. Launch Photoshop, go to the File menu, select Scripts, then choose Image Processor.
Step 3. Click Select Folder under Select the images to process and import the photos you wish to compress.
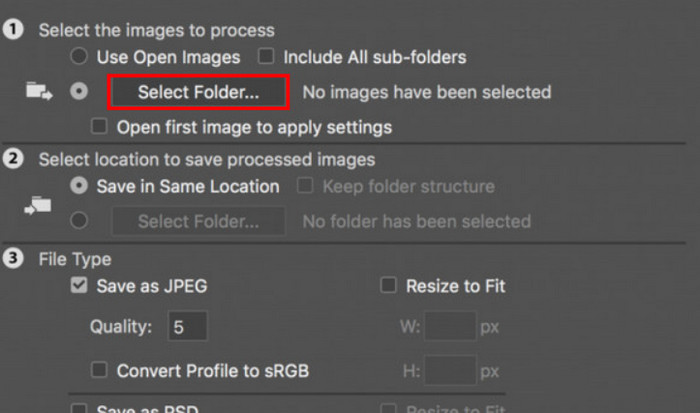
Step 4. Photoshop will automatically create a new folder within the original one to store the compressed images.
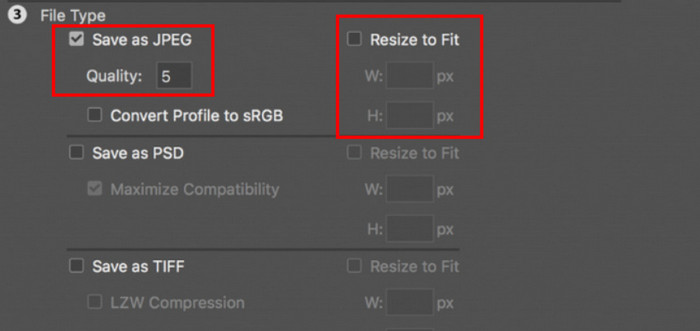
Step 5. In the File Type section, check Resize to Fit, then specify the maximum width and height for the resized images.
Part 4. Photoshop Alternative Online Image Size Reducer - FVC Image Compressor
The interface of Photoshop is still too complicated for novices and those with urgent picture-processing tasks. And there are quite a few steps to take to reduce the size of the image. There is a more convenient alternative, the FVC Free Image Compressor. All you have to do is upload the image you want to process through your browser and it will automatically compress the size of the image for you, and it also allows you to manually adjust the aspect ratio, rotate or flip the image on the web page.
There is another issue that we can't ignore. Regular use of Photoshop requires a subscription. But the Adobe product range is expensive. The FVC Free Image Compressor is a completely free online tool. Did you think about batch processing of images? The developers of FVC Free Image Compressor have not overlooked this detail. Currently, you can batch-process up to 40 images on this platform.
Step 1. Go to the official website of FVC Free Image Compressor.
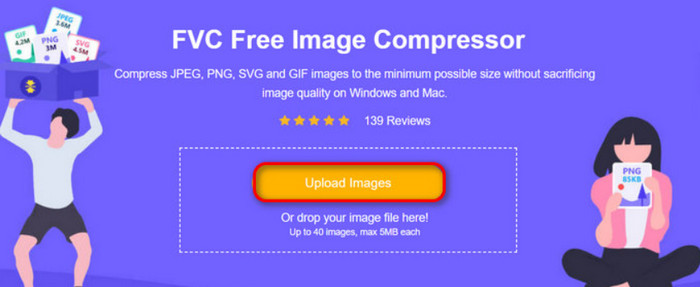
Step 2. Click Upload Images to choose and upload the photos you want to compress.
Step 3. After the compression process finishes, preview the updated file sizes. Then, click Download All to save the compressed images to your device.
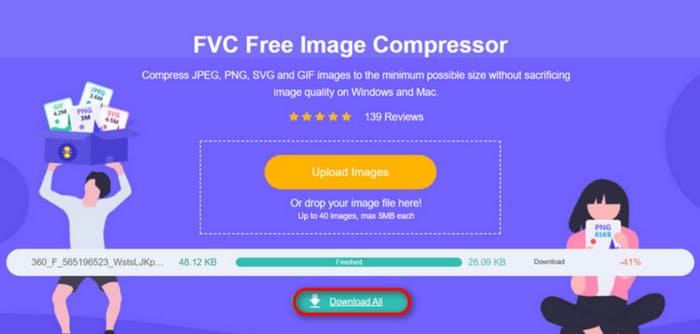
After getting the compression results, are you surprised that the sharpness of the images is not lost much? The FVC Free Image Compressor uses the most advanced and efficient compression techniques to find the perfect balance between image resolution and size.
Whether a novice or a professional, you will find that FVC Free Image Compressor is the best alternative to Photoshop.
Part 5. FAQs of How to Shrink An Image in Photoshop
How can you shrink an image in Photoshop without losing quality?
To reduce image size in Photoshop without distortion, the point is to make sure you choose Resample at the time of operation. It is also essential to keep an eye on changes in sharpness when adjusting the aspect ratio.
How can you make a photo smaller without cropping?
You can use the photo resizer to change the screen size. Alternatively, consider compressing the image files. This will significantly make it smaller.
How do you make a photo that is less than 1 MB?
You can use some specialized image compressors. Tools that allow you to adjust the compression level and preview the size of the compressed image before downloading it are especially recommended, such as Photoshop or FVC Free Image Compressor.
Conclusion
After learning how to shrink an image in Photoshop in the above content, you can try to do it yourself. We've included pictures for each step to ensure you can see every detail. If you don't want to download Photoshop additionally to your device or are dissuaded by its complicated interface, try using FVC Free Image Compressor for your images. It's easy to use with simple steps and free service.
-
 How to Compress MXF with Premiere Pro and Free Online
 How to compress MXF with smaller file size? How to compress MXF files in Adobe Premiere Pro? This post shares 2 ways to compress MXF files.
-
 How to Compress MOV Files Easily: 6 Free Choices for You
 To compress MOV, you can refer to the 6 options in this article, including 3 desktop software and 3 online platforms. We will show you how to use them here.
-
 How to Compress an MP4 Video to Smaller Size
 MP4 video is too large for uploading? Want to reduce the video size? Here are 3 efficient ways to compress an MP4 file to smaller size with no limit.