


The Best Guide on How to Fix Snipping Tool Not Working
Snipping Tool is the default screenshot tool installed on Windows computers. It is free and allows users to capture, edit, and save screenshots on their computers.
However, ever since it was put into use, users have reported that there is a Snipping Tool not working problem. Don’t worry. This guide will first analyze all the possible causes and then give you the 6 most effective solutions.

Part 1. Why Is My Snipping Tool Not Working
Let's start by finding the possible triggers that may cause Snipping Tool does not work. This section will be divided into points to make it easier for you to understand.
1. The Snipping Tool is interfered
If you have other screenshot programs running on your computer simultaneously, it may affect the regular operation of the Snipping Tool.
2. Focused Assistant is turned on
Focus Assistant will help you block message pop-ups, information alerts and interruptions. Sometimes, it will cause the Snipping Tool not to work on Windows 10.
3. The software is corrupted
The Snipping Tool application may be corrupted. If you use it again at this time, you will find the system crashes.
4. System version is too low
Older Windows systems may not support the Snipping Tool to work correctly. You need to update your device even though.
Part 2. Fix Snipping Tool Not Working on Windows 10/11
Following these several triggers and combining them with other users' opinions, we have compiled a total of 6 solutions that can fix Microsoft Snipping Tool not working issue. Each of them is equipped with detailed instructions and step-by-step guides. You can decide how to do it according to your own situation.
Solution 1. Switch to Other Screenshot Tools
The functionality provided by the Snipping Tool is fundamental. We suggest you consider some third-party products if you need a more comprehensive screenshot or video recording program. That way, you don’t need to troubleshoot; just start recording again.
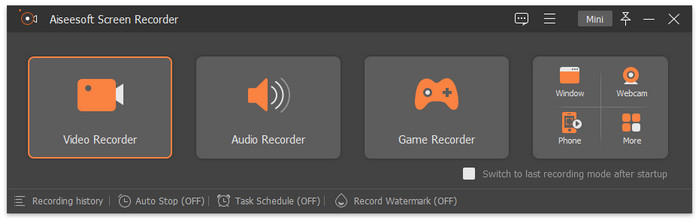
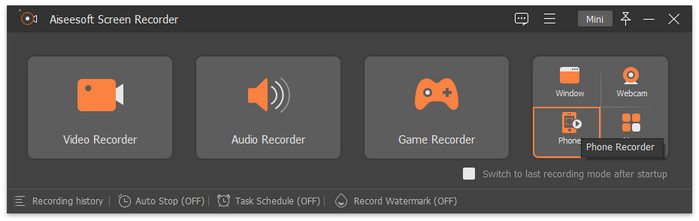
Among the many screenshot and screen recording tools available, we chose FVC Screen Recorder. This program supports recording video from the screen and webcam, audio from the system speakers and microphone, and the content on your phone’s screen (as long as you can ensure you connect your phone to your computer). Of course, we can’t miss its screenshot function.FVC Screen Recorder supports self-selected screenshot areas and provides simple image editing functions. This will give you ample time to finish your work before outputting it.
Free DownloadFor Windows 7 or laterSecure Download
Free DownloadFor MacOS 10.7 or laterSecure Download
Here is how to capture your computer screen with the FVC Screen Recorder.
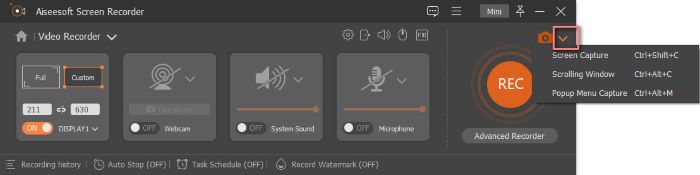
Step 1. Download and install FVC Screen Recorder on your computer. Enter its main interface.
Step 2. Choose Video Recorder on its homepage.
Step 3. Choose Video Recorder on its homepage.
Solution 2. Update Windows System
As we have already mentioned, Snipping Tool not working in Windows 11 can be caused by the system not being updated correctly.
In this case, you can try to update the system version on your computer, and Microsoft sometimes updates the Snipping Tool or other built-in applications by updating the Windows system. Regular updates can help you fix a lot of minor system bugs.
Here is how to update your Windows system.
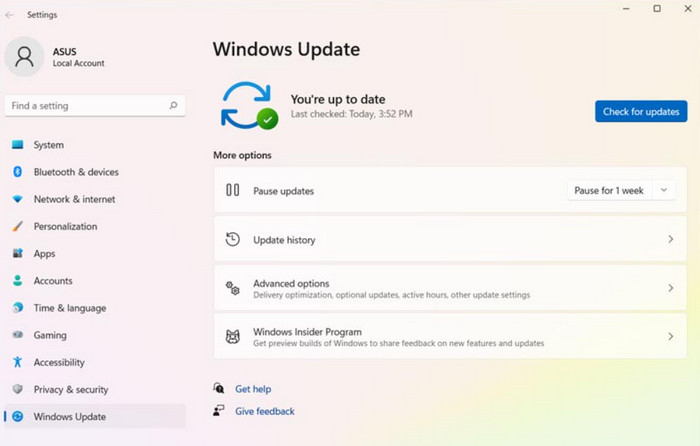
Step 1. Go to the Start button on your desktop. Click on it and choose Settings > Windows Update.
Step 2. Click Check for updates. Wait for a second. If there is a new version, download and install the new Windows system on your device.
Solution 3. Disable Focus Assistant
Focus Assistant organizes some disturbing ad pop-ups and app notifications. Unfortunately, it can also cause the Snip & Sketch tool not to work. To restore the Snipping Tool to its normal state, we recommend you disable the Focus Assistant.
Here is how to disable Focus Assist on your Windows computer.
Step 1. Navigate to Start and choose Settings.
Step 2. Go to the menu on the left side and choose System > Focus assist.
Step 3. Choose Off. Then, restart your Windows computer and try to capture your screen with the Snipping Tool again.

Solution 4. Fix Snipping Tool
To deal with the problem of the print screen Snipping Tool not working, Windows has added a tool repair button and a reset button in the settings. You can click them to solve the problem.
Here is how to fix the Snipping Tool on Windows.
Step 1. Click Start > Settings. Choose Apps in the menu.
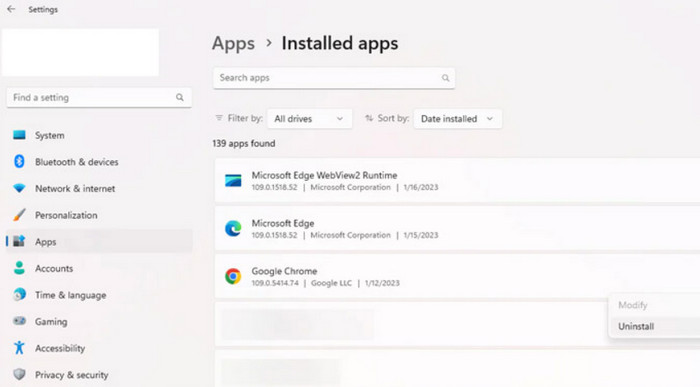
Step 2. Find Installed apps and locate Snipping Tool > Advanced options.
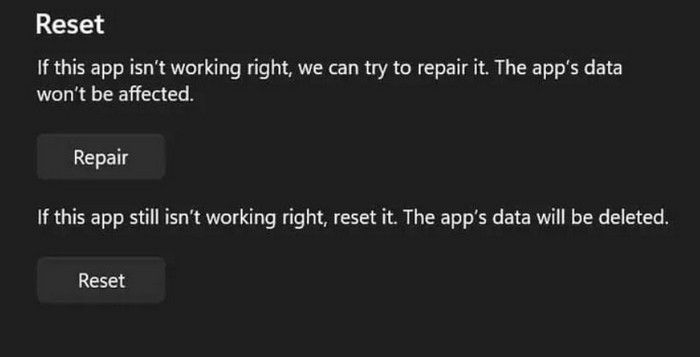
Step 3. The Apps & features menu will be opened. Go to the Reset tab and choose Repair or Reset.
Step 4. The process will be over in a second. Restart your computer and the Snipping Tool to see if everything is correct.
Solution 5. Turn off the Third-Party Software
If other screen recording software is running, you will encounter a Snipping Tool shortcut not working. You can find out if any other software is interfering with the Snipping Tool in the Task Management Center.
Here is how to look for interfering screen recording software on your device.
Step 1. Go back to your computer's desktop and turn off all screen recording software.
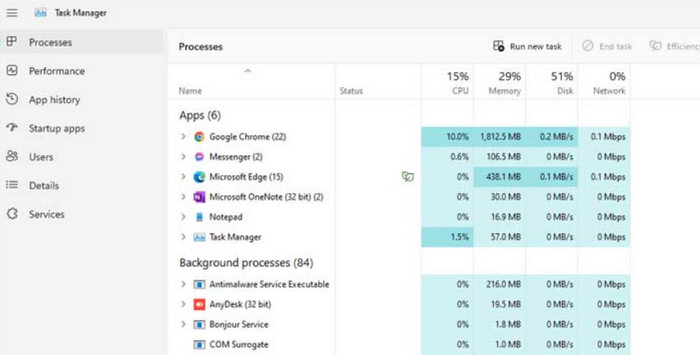
Step 2. Press Ctrl + Shift + Esc on your keyboard simultaneously, and the Task Manager on your computer will be called up.
Step 3. You can check if there is any ended screen recording process. If there is, right-click the process and end it.
Solution 6. Disable Auto Copy to Clipboard Feature
Snipping Tool screen recorder can automatically copy screenshots to the clipboard. However, if this feature is not working correctly, the Snipping Tool may not work. Disable the Auto copy to clipboard feature directly.
Here is how I fix the Snipping Tool not working by disabling the Auto copy to clipboard feature.
Step 1. Open the Snipping Tool on your device.
Step 2. Click the three-dots icon. A menu will be expanded. Click on the Settings option.
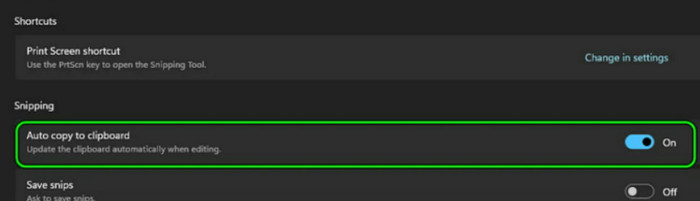
Step 3. Go to the Snipping tab. Disable the Auto copy to clipboard feature.
Step 4. Finally, restart the Snipping Tool and try to capture your screen again.
Part 3. FAQs About Snipping Tool Does Not Work
Why is my Snipping Tool not working?
There are various reasons for this. First, see if your system and Snipping Tool are due for an update. Second, see if you have any other screenshot software open simultaneously.
How do I get the Snipping Tool shortcut to work?
Press the Windows, Shift, and S keys on your keyboard simultaneously. Snipping Tool is successfully evoked at this point. You can move your mouse to select the part you want to photograph.
What is the best Snipping Tool for Windows 10?
The best option is the Snipping Tool that comes with your system. If you find its features too simple, we recommend using the best third-party screenshot software, FVC Screen Recorder, or Snagit screen capture.
Conclusion
In this guide, we have analyzed several possible causes of the Snipping Tool not working and based on that, we have given you 6 solutions. You can follow the step-by-step guide to slowly adjust your computer and application settings. Of course, the most effortless way is to use the best alternative to the Snipping Tool, the FVC Screen Recorder.
-
 Top 5 Android Screen Recorder Apps You Must Acquire in 2025
 Having trouble because you can’t do a screen recording on your Android? If so, this article reviewed the Android screen recorders you can download on.
-
 Top 5 Zoom Meeting Recorders to Record Meetings on Zoom [2024]
 Need to record a zoom meeting to not miss out on the important details of your meeting? If so, this article provides the best zoom recorders you should know.
-
 Review of Snagit Screen Capture: Price, Usage, & Alternative
 If you want to know about Snagit Screen Capture, this article is the best tutor. We'll go over what it means, the price, and actually measure its performance.